 I know it seems like I throw miso in everything – like Jamie Oliver with all that damned rosemary – but if you’re a fan of oysters stay with me. If you have friends and family that are a little oyster-phobic this is the recipe that will turn ’em around. It’s that damned good!
And that’s impressive because there aren’t many things that people eat more polarizing than oysters. Shuck a couple and half the people at your dinner party will gag while the other half dig in with wild abandon. My wife was one of the former (an unrepentant hater of oysters and most other bivalve mollusks) up until only recently. Now she tolerates a few raw oysters now and then but only if they’re the size of a dime and the larger ones get only scornful looks unless they arrive slathered in miso mayonnaise.
Mixing mayonnaise and miso and using it as a glaze for grilled seafood is an old Japanese pub trick called Motoyaki that I used to make every winter at Wasabiya. The miso, a rustic red variety labeled akamiso is a go-to ingredient in pubs because of its pungent and salty flavour, perfect for pairing with beer and sake. The mayo cuts the overwhelming umami of the miso and makes it easier to nape into an oyster shell. Once it’s slung under a broiler the oyster-mayo mixture bubbles and turns a beautiful caramel colour on top.
 This is the most basic kind of oyster motoyaki and there are lots of sexy ingredients you can add to the in-shell mix that will change the flavour and texture. The one that always pops into my mind is the combination of spring peas, garlic scapes and pancetta that chef Nicholas Nutting rocked a few years back for a BCSA Gala Dinner. Be careful with adding too many salty elements though, miso is plenty salty all by itself!
Now to get your oyster to stand up during the assembling, cooking and eating process takes a little bit of patty-cake, an eye for architecture and a generous handful of salt:
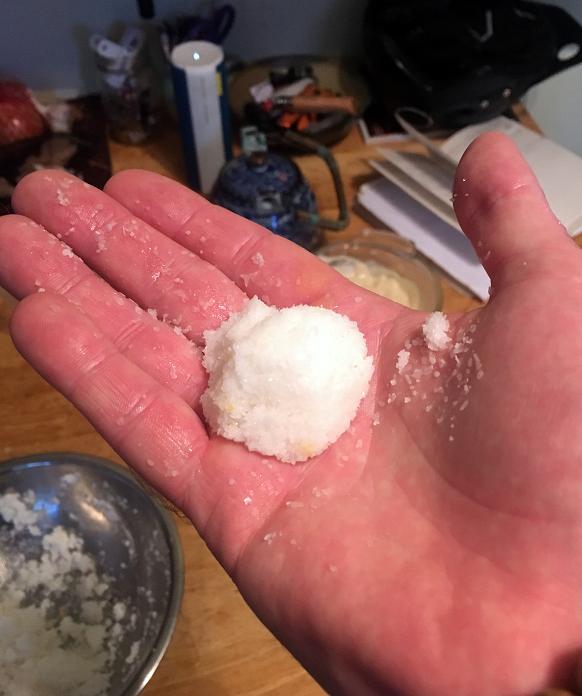 Salt Crust
A salt crust is a simple mixture of salt and egg whites that hardens when baked, forming a salt dome under which you can bake all manner of meat or fish without browning or (in this case) create a tough little foot that will hold our oysters in place.
Whisk together 1 ½ cups (220g) of white table salt with the white from 1 large egg (15ml) in a medium bowl. Once it’s all mixed up take a big pinch and squeeze it into your palm, if the mix forms into a solid marble-sized shape when you open your hand it’s ready to rock. Think of a snowball made of freshly fallen snow, just barely holding together with a bit of powder falling off here and there. If it’s crumbly add a bit more egg white (not much!) if it’s smooth ‘n gloopy add more salt.
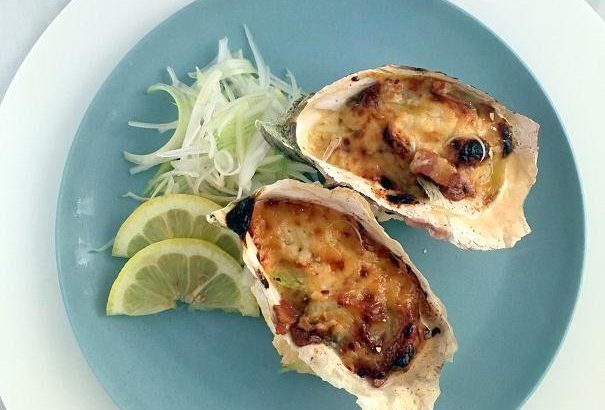
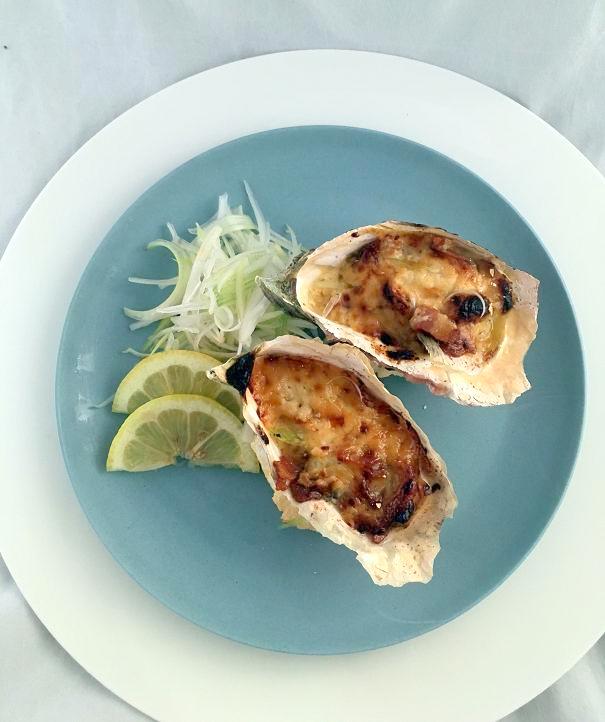
Miso-Roasted Oysters (Serves 4-8)
Ingredients
- 8 Medium-Sized Beach Oysters (55g each, scrubbed to remove excess grit and bugs from the shell)
- ½ Shallot (45g, finely chopped)
- 1 Tbls. (15ml) Mirin
- 1 Tbls. (18g) Red Miso
- 1/3 cup (80g) Mayonnaise
- Zest of ½ a Lemon
Method (Pre-heat your oven for 450˚F or 230˚C)
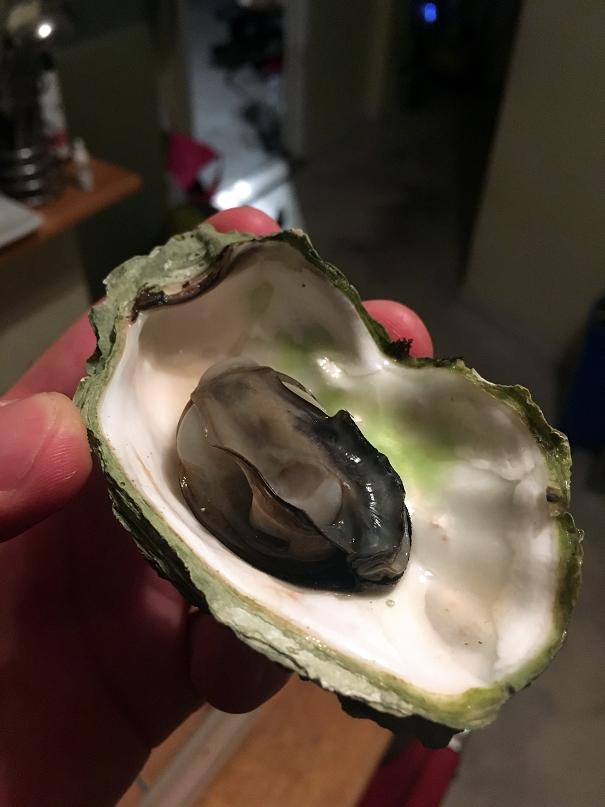
- Lay out the oysters on a baking sheet, flat-side-up and fire them into your ‘screamin hot oven for 8 minutes. Steam will build up inside each oyster, causing them to “pop” and making the shucking process much easier. We’re not trying to completely cook ‘em, so peek in after about five minutes and if the majority of your oysters have opened, pull ‘em out! Watch out for hot oyster juice lying in wait at the bottom of the baking sheet… It’ll give you a nasty little burn if you don’t see it in time. Grab a towel and transfer the oysters to a cutting board and let them cool for a couple of minutes before you get ‘shuckin.
- Use a butter knife or an oyster shucker if you have one to remove the flat lids of the oysters. If any oysters remain firmly closed insert the tip of your shucker into the pointy hinge at one end and carefully wiggle it back and forth until it pops open. Don’t force it in! Oyster shells are jagged and can give you a nasty scar when they slip and shuckers love to end up in fingers.
- Once the oyster are open you can scrape the oyster meat into a waiting bowl of cold water to cool ‘em down and remove excess grit. Rinse the rounded, bottom shells off as well and set them aside. Those are going to be used to hold the oysters during cooking and act as a rustic little bowl. The flat halves of shell can be thrown into the compost.
- Clean off your baking sheet and rub it down with a bit of oil. Plop a large marble-sized ball of salt crust onto the sheet for each oyster, about two or three inches apart. Gently press the oyster shells into the salt crust. If the salt consistency is correct it should hold the oyster shell upright without any sagging. Sprinkle a bit of chopped shallot into the bottom of each shell and top with an oyster.
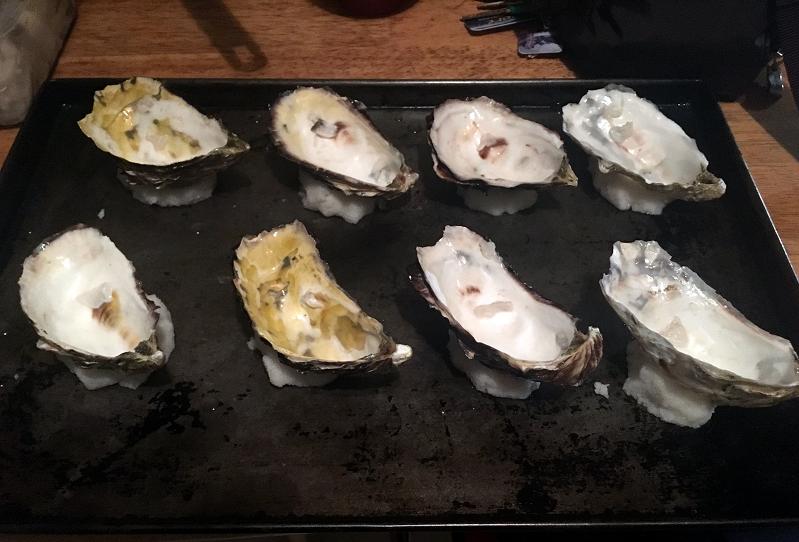
- Whisk the mirin and miso together in a small bowl until it forms a paste. Add the mayo and lemon zest and whisk again. The mixture should retain a mayo-like consistency. Divide the mixture equally over the oysters, trying to cover as much of them as possible. Fire the oysters into the oven on the topmost rack and broil them for approx 10 minutes or until they are bubbling and golden brown on top.
- Serve them immediately with a pinch of cured capelin (masago) or salmon roe (Ikura) on top; some shaved green onions, lemons and an ice-cold glass of pilsner wouldn’t hurt either.
Oh, and if your serving them to guests, tell them not to eat the salt crust! *laughs* Happens every time!
 Music to Shuck Oysters To:
Mammal Hands – Floa